

Decoding Your Backgammon Board and Pieces
When you first see a backgammon board, it can look a bit busy. With all those triangles and the big bar splitting it down the middle, it seems like a lot to take in. But once you get the hang of its layout, that board transforms into your personal strategic playground. The trick is to see it as a very specific racetrack, not just a random collection of shapes.
The board’s design is beautifully symmetrical. This isn't just for aesthetics; it’s essential for clear backgammon game instructions. Backgammon is an ancient game, with rules that have been refined over centuries, but the modern version boils down to a fantastic mix of luck and calculated movement. The whole game is played on a surface featuring 24 narrow triangles known as points, which are grouped into four quadrants of six points each.
The Board Quadrants and Points
Imagine the board as a horseshoe-shaped track. Each player has 15 checkers (your game pieces, which are disc-shaped) that must journey from their starting spots all the way around to their "home." The board is broken down into four key zones:
- Your Home Board: This is your final destination, where all your checkers must land before you can start taking them off the board. For you, this is points 1 through 6.
- Your Outer Board: This quadrant sits just outside your home board, covering points 7 through 12.
- Opponent's Home Board: This is where your opponent is trying to get their checkers. From your perspective, this area contains points 19 through 24.
- Opponent's Outer Board: This is where most of your checkers begin their journey, specifically on points 13 through 18.
Here’s a look at a standard backgammon board with the points numbered from one player's point of view.
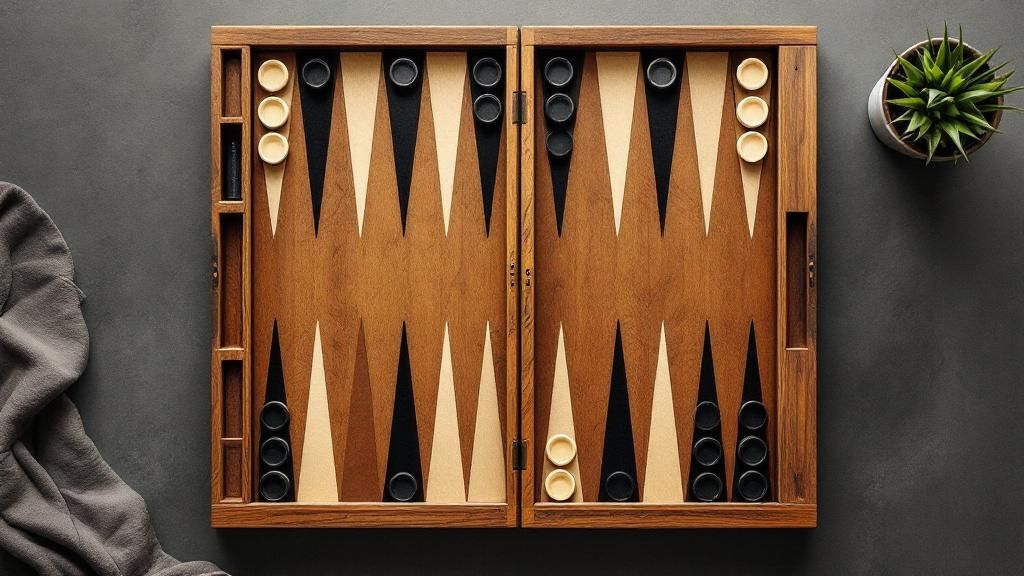
This image clearly lays out the four quadrants and the numbering system. Take note of how your point 1 is your opponent's point 24. You are always moving in opposite directions, which is what creates the central conflict and excitement of the game.
The Equipment That Drives the Game
Besides the board and checkers, a few other items are crucial to play. The quality and feel of these pieces can really make the game more enjoyable. For those who enjoy well-made things, exploring a collection of artisanal backgammon sets can bring a bit of class to your games.
- Checkers: You and your opponent each get 15 checkers in your own distinct color. Your job is to move all of them into your home board and then "bear them off" (remove them from play) before your opponent manages to do the same.
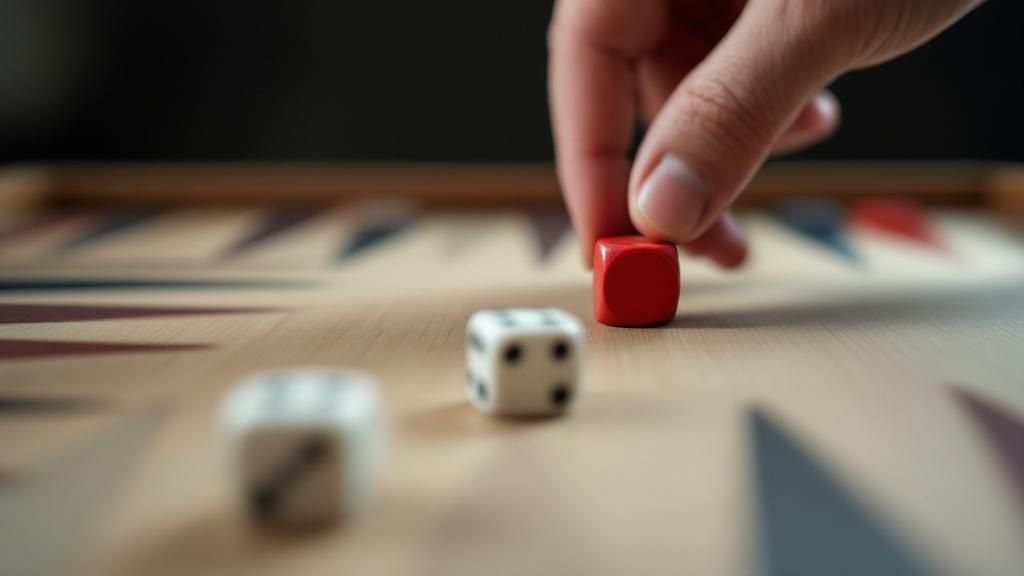
- Dice: Two regular six-sided dice dictate how many points you can move your checkers each turn. Rolling doubles is a fantastic bonus—it lets you use each die's number twice, giving you a total of four moves.
- The Doubling Cube: This is a six-sided cube marked with the numbers 2, 4, 8, 16, 32, and 64. It sits on the side of the board at the start. If you feel like you have a clear advantage, you can "double" the game's stakes. Your opponent then has to choose: either accept the higher stakes and play on, or concede the game right then and there. This cube introduces a thrilling element of psychological warfare and risk-taking, which we'll get into later.
Setting Up Like You've Been Playing for Years
Getting the board set up correctly is your first move in any game of backgammon. A proper starting layout isn't just about following the rules; it's what creates the immediate tension and strategic possibilities the game is known for. Once you get the hang of it, you’ll be able to set up the board in seconds without a second thought.
A Memory Trick for Flawless Setup
Instead of trying to memorize 24 different points, let's break it down. You have 15 checkers, and they are only placed on four specific points to start. The setup is a mirror image for each player, which makes it much easier to remember. From your side of the board, moving counter-clockwise toward your home board (the six points in the bottom right), here’s the layout:
- Five checkers on your 6-point. This is a key defensive point in your home board.
- Three checkers on your 8-point. These are in your outer board, ready to make a move.
- Five checkers on the 13-point (your opponent's 12-point). These are your mid-point checkers.
- Two checkers on the 24-point (your opponent's 1-point). These are your runners, the two checkers with the farthest to travel.
Your opponent's checkers are placed in the exact opposite positions. For instance, while your runners are on their 1-point, their runners are on your 1-point. This symmetrical setup ensures immediate conflict and strategic decisions from the very first roll.
To give you a full picture of the board, here’s a table detailing where every checker goes and why. This view helps clarify the roles each group of checkers plays from the outset.
Initial Checker Placement Guide
Starting positions for each player's 15 checkers across the board points
| Point Number | Player 1 Checkers | Player 2 Checkers | Strategic Purpose |
|---|---|---|---|
| 1 | 0 | 2 | These are Player 2's runners, starting deep in Player 1's home board. |
| 6 | 5 | 0 | Creates a strong defensive "made point" for Player 1 in their home board. |
| 8 | 3 | 0 | These are Player 1's builders, positioned to create new points or attack. |
| 12 | 0 | 5 | Player 2's mid-point checkers, creating a blockade for Player 1's runners. |
| 13 | 5 | 0 | Player 1's mid-point checkers, blocking Player 2's runners from advancing. |
| 17 | 0 | 3 | Player 2's builders, ready to fortify their outer board. |
| 19 | 0 | 5 | Player 2's strong home board anchor, mirroring Player 1's 6-point. |
| 24 | 2 | 0 | These are Player 1's runners, which have to traverse the entire board to get home. |
This table shows how the setup isn't random; it's a centuries-old design built for a perfect balance of offense and defense right from the start.
The Logic Behind the Starting Formation
The way the checkers are placed is what makes backgammon so dynamic. Your two runners on the 24-point are immediately vulnerable and need to escape, while the five checkers on your 6-point create a solid defensive wall, known as a prime, in your home board. The checkers on the 8-point and 13-point are often called builders; you'll use these to construct new blocking points or to hit your opponent's checkers. Every aspect of the game—running, blocking, hitting, and bearing off—originates from this carefully crafted starting arrangement.
Movement Rules That Actually Click
The soul of backgammon isn't in the setup; it's in the dynamic, moment-to-moment decisions you make based on the roll of the dice. This is where the real fun begins, and grasping the movement rules is what turns confusion into confidence. The core principle is simple: your checkers always move in one direction—from your opponent's side of the board, across the middle, and into your home board.
You’ll always be moving from higher-numbered points to lower-numbered points. For instance, a move from the 13-point to the 7-point is a move of 6 spaces. Think of it as a one-way street around a racetrack.
Reading and Using Your Dice Roll
When your turn starts, you'll roll two dice. The numbers you get aren't added together; they represent two distinct moves. If you roll a 5 and a 2, you have two separate moves to make: one of five spaces and another of two spaces.
You have a couple of ways to play this:
- Move two different checkers: You could advance one checker five spaces and another checker two spaces.
- Move one checker twice: You could move a single checker a total of seven spaces. This involves moving it five spaces to an open point, then another two spaces from that new spot. Critically, the intermediate point (where it lands after the 5-space move) must be open. You can't just hop over a blocked point.
What happens if you roll doubles, like two 3s? This is a game-changer. When you roll doubles, you get to play that number four times. A double 3 isn't a move of 6; it's four individual moves of 3 spaces each. This can dramatically alter the board, letting you build a defensive wall or race a checker home in one turn.
Navigating the Board: Open vs. Closed Points
A crucial part of the backgammon game instructions is knowing where you can and cannot land. You can only move your checker to an open point. An open point is any point on the board that is not occupied by two or more of your opponent's checkers.
Let’s break down the status of any given point:
- Empty: It's free. You can land here.
- Occupied by your own checkers: You can land here and stack your checkers.
- Occupied by one opposing checker (a "blot"): You can land here. This is called hitting.
- Occupied by two or more opposing checkers (a "made point" or "block"): You cannot land or even touch down on this point. It’s a roadblock.
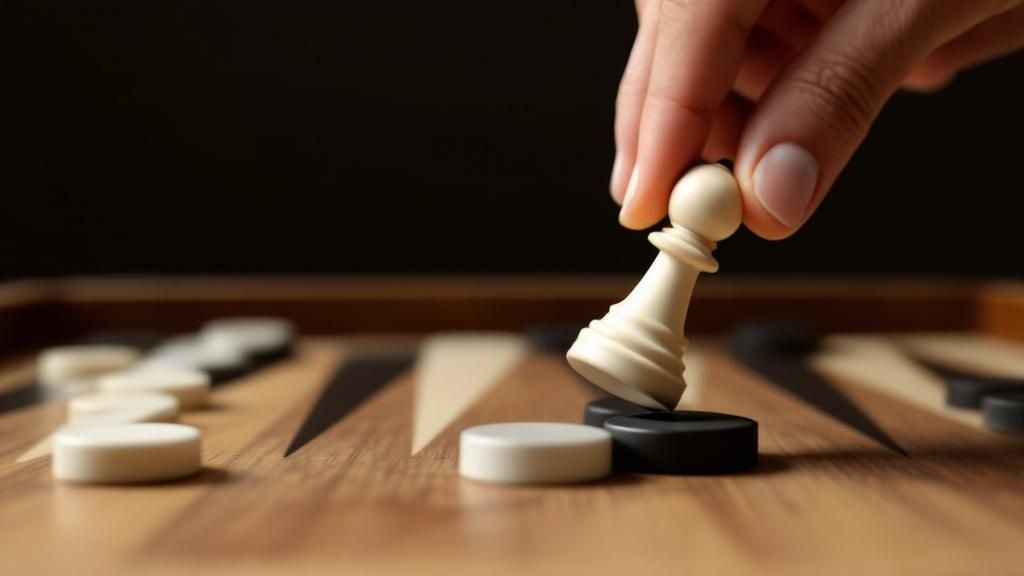
Hitting is a fundamental part of backgammon strategy. When you land on a point occupied by a single opposing checker—the blot—you send that checker to the bar, the raised divider in the middle of the board. This is a significant setback for your opponent, which we'll get into more detail about later.
To help you see how these movement rules connect to winning, here's a quick look at the different types of victories and their point values.
| Dice Roll | Board Situation | Legal Moves | Illegal Moves |
|---|---|---|---|
| 4-2 | Opponent has a block on point 5. Your checker is on point 9. | You can move from point 9 to point 7 (2 spaces). You must play the 2. The 4-space move is blocked. | You cannot move from point 9 to point 5, as it's blocked. |
| 6-6 | You have a checker on the bar. Opponent's home board is open. | You can enter on your opponent's 6-point, then make three more 6-space moves with any available checkers. | You cannot combine the moves to jump a 12-space distance over a blocked point. |
| 5-1 | You have one checker on point 6 and another on point 3. | Move the checker on point 6 to point 1 (5 spaces). Then, move the checker on point 3 to point 2 (1 space). | You cannot move a checker from point 6 to point 5 if the opponent has two checkers there (it's blocked). |
| 3-3 | You have a blot on point 13. Opponent has a checker on point 10. | You can use one of your 3s to move the opponent's checker from point 10 to hit your blot on point 13. Not a good move, but legal. | You cannot use your turn if all your potential moves are blocked by your opponent's made points. |
This table shows that every roll presents a puzzle. The best move isn't always the most obvious one; it's about understanding which moves are legally possible and which ones give you a strategic edge.
When You Can't Move
Sometimes, the dice just don't cooperate. You might find yourself in a situation where you cannot make a legal move.
- Forced to Play: You must use both dice numbers if you can. If you can legally play only one of the numbers, you must play that one. If you can play either number but not both, you are required to play the higher number.
- No Legal Moves: If none of your checkers can move based on your roll (because all potential landing spots are blocked), you lose your turn entirely. This often happens when your opponent has built a strong prime—a wall of six consecutive made points.
For example, imagine you roll a 6-1. You have a checker that can legally move one space, but all your checkers are blocked from moving six spaces. In this scenario, you must make the 1-space move, and then your turn is over. Understanding these fine points is what separates casual play from tactical mastery. Many experienced players sharpen these skills by discussing tricky situations on forums and platforms like Backgammon Galaxy.
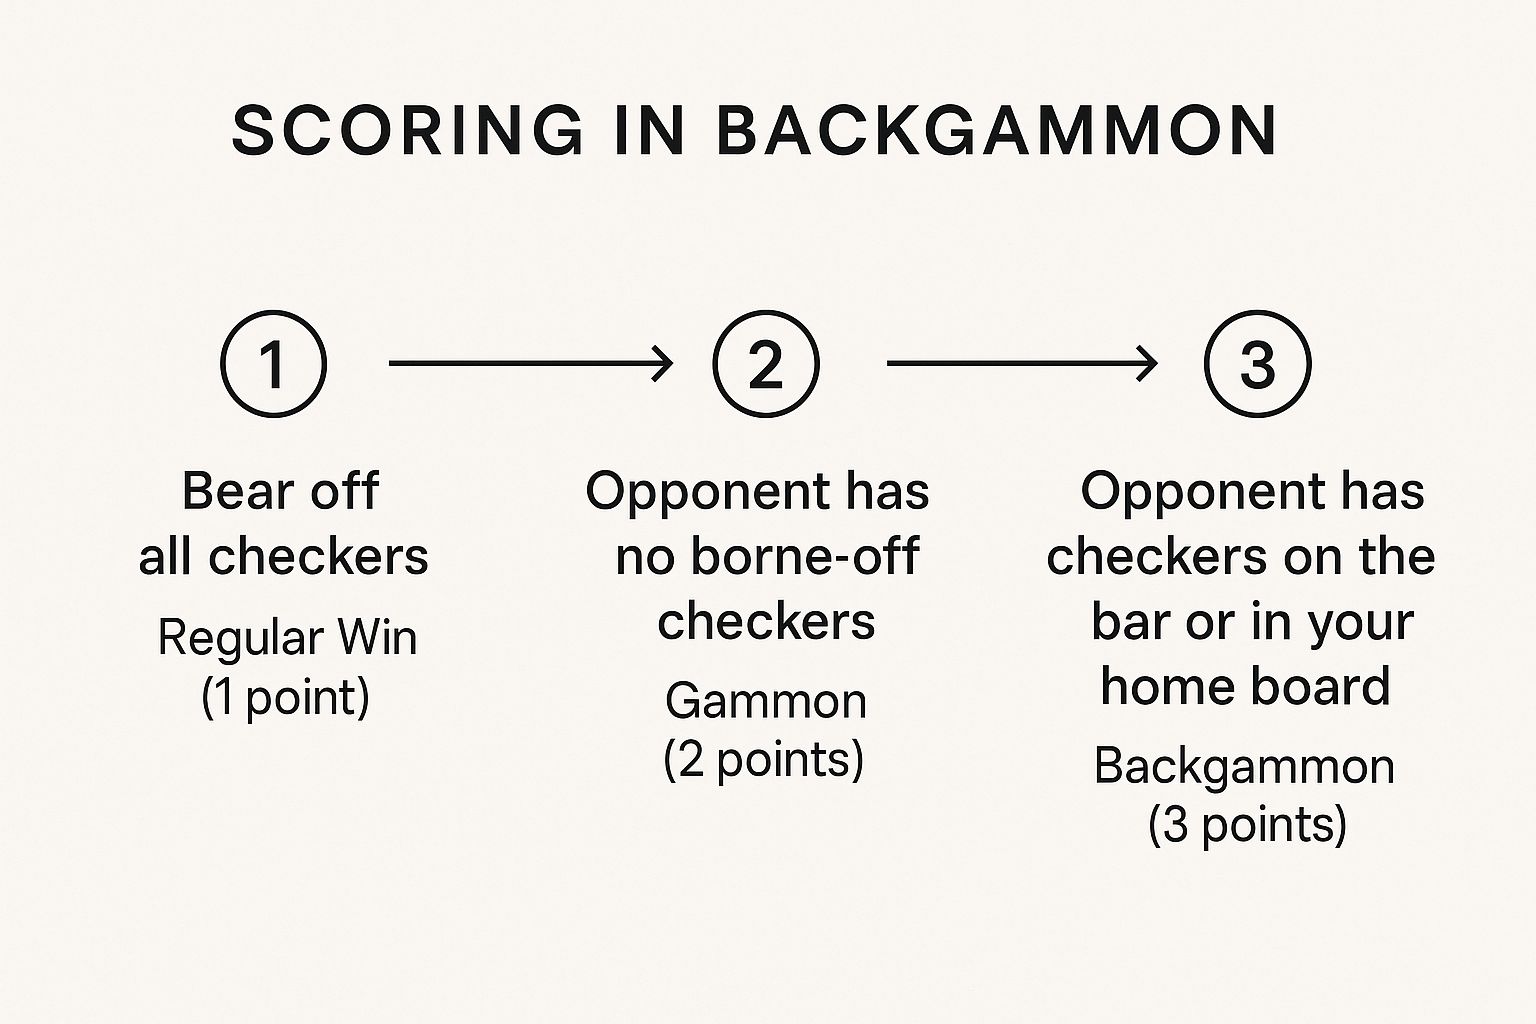
This visual shows that winning isn't just about finishing first; it's about how you win, which is a direct result of how effectively you've moved your checkers throughout the game.
Hitting and Bar Strategy That Works
This is where backgammon gets its reputation for nail-biting finishes and stunning comebacks. The simple act of hitting an opponent's checker and dealing with the consequences from the bar is a fundamental part of the game's tactical heart. It’s what separates players who just push pieces around from those who truly understand the game's rhythm. Let's get into when hitting is a brilliant move and when it's just a clumsy mistake.
To Hit or Not to Hit: The Eternal Question
Hitting an opponent's single checker, known as a blot, sends it straight to the bar. This accomplishes two key things: it messes up their race by making them start over from your home board, and it buys you precious time. But hitting isn't a no-brainer; it's a constant game of risk versus reward.
Before you make that aggressive hit, pause and ask yourself a few questions:
- What's the downside? When you hit, you often leave your own checker exposed as a blot. If your opponent hits you back and has a strong home board (several points made), you could be in serious trouble trying to re-enter. Hitting them only to get hit back and trapped behind a prime is a classic blunder.
- Where is the hit happening? A hit deep in your own home board (on your 1, 2, or 3-point) is incredibly powerful. It sends their checker on a long trip back. Hitting in the outer boards is less damaging to their race but can still be a good way to slow them down or build your position.
- What does the rest of the board look like? If you're way ahead in the race, it’s often smarter to avoid conflict and just run for home. Getting into a hitting match can backfire. On the flip side, if you're far behind, you have to hit. It's your best shot at slowing them down because a pure racing game from behind is almost always a losing proposition.
Let's say your opponent has a blot on their 5-point, and you can hit it by moving from your 8-point. Sounds good, right? But now your checker is a blot on their 5-point, vulnerable to 16 different return shots (any roll with a 5, plus combinations like 4-1 and 3-2). If they roll one and hit you back, you might find your position is suddenly much worse.
Life on the Bar: The Art of Re-entry
Finding yourself on the bar is a setback, but it's certainly not game over. On your turn, your number one job is to re-enter that checker into your opponent's home board. You do this by rolling a number that corresponds to an open point. For example, rolling a 4 lets you re-enter on their 4-point, as long as they don't already have two or more checkers there.
If you have more than one checker on the bar, you must get them all back in the game before moving any other pieces. If your roll only allows you to re-enter one, you must do so and give up the rest of your move. The real strategy kicks in when you have options. Imagine you roll a 6-2, and both the 6-point and 2-point are open. Which one do you take? Usually, entering on the higher point (the 6-point) is the better move, as it gives your checker a clearer escape route.
For a closer look at these kinds of tactical choices, our guide on backgammon strategy for beginners has easy-to-follow tips that can really sharpen your game. And remember the mental game—don't panic when your plans are disrupted. A rushed move from the bar can easily turn a small problem into a game-losing disaster.
Bearing Off and Closing Out Games
The final sprint of a backgammon game is the **bear-off**, and this is where a game you thought you had in the bag can suddenly go south. This isn't just a simple race to the finish line; it's a phase that demands precision and a bit of forward thinking. The objective is to move all **15** of your checkers off the board, but you can't even start until every single one of them has made it into your home board (points 1 through 6).The Mechanics of Bearing Off
Once all your checkers are home, you can begin removing them according to your dice rolls. For example, if you roll a 6, you can take a checker off the 6-point. A roll of 4 lets you remove a checker from the 4-point. This part of the backgammon game instructions seems straightforward, but it gets tricky when the dice don't give you what you need.
So, what happens if you roll a number for a point where you don't have any checkers? You don't just forfeit the move. Instead, you're required to move a checker from a higher-numbered point.
- Scenario: Let's say you roll a 5-2. You have checkers on your 6-point, 4-point, and 1-point, but both your 5-point and 2-point are empty.
- Action: Since you can't bear off using the 5 or the 2, you must use those dice values to move checkers from a higher point. A good move would be to advance a checker from the 6-point five spaces down to the 1-point, and then move another checker from the 6-point two spaces to the 4-point.
If you roll a number for an empty point and have no checkers on any higher-numbered points, you must then remove a checker from the highest point you currently occupy. For instance, if you roll a 6 but your highest checker is on the 4-point, you simply bear off a checker from that 4-point. This rule is your key to finishing the game when your checkers are bunched up on the lower points.
Strategic Positioning for the Endgame
The real art of the bear-off begins long before you remove your first piece. The way you arrange your checkers inside your home board as you bring them home can make or break your endgame. A clunky, poorly distributed setup can be a complete nightmare, leaving you with "wasted" high rolls.
Picture this: all your checkers are piled high on your 1, 2, and 3-points. Rolling a double 6 at this stage is incredibly frustrating because the best you can do is remove four checkers from the 3-point. The ideal strategy is to spread your checkers out as evenly as you can across all six points of your home board. This gives you the best chance to use whatever the dice give you.
The race gets particularly intense when your opponent is breathing down your neck. The worst thing that can happen during a bear-off is getting hit. If your opponent manages to hit one of your blots, that checker is sent to the bar. You are not allowed to bear off any more pieces until that checker has re-entered the board and traveled all the way back around to your home board. This single event can easily turn a sure win into a devastating loss.
Doubling Cube and Competitive Play
If you want to know what separates a casual game of backgammon on the porch from a serious, high-stakes match, you need to understand the doubling cube. This simple, numbered cube adds a thrilling layer of psychological warfare and risk management to the game. Learning how to use it is just as important as knowing how to move or hit a checker, and it's a fundamental part of any competitive backgammon game instructions.
How the Doubling Cube Works
At the beginning of the game, the doubling cube is placed on the bar (or beside the board) with the number 64 facing up. This is called the "centered" position, which means either player can offer the first double. If you feel you have a clear advantage during your turn—but before you roll the dice—you can propose doubling the stakes. To do this, you turn the cube to show the "2" and offer it to your opponent.
Your opponent now has a big decision to make:
- Take (Accept): If they accept, they take the cube and place it on their side of the board with the "2" facing up. The game continues, but it's now worth 2 points instead of 1. What's key here is that only the player who accepted the double (and now holds the cube) can propose the next one, which would be to 4.
- Drop (Decline): If they decline the double, they forfeit the game right then and there. You immediately win 1 point (the value of the game before you offered the double), and you start a new game.
This exchange can go back and forth, pushing the game's value from 2 to 4, 8, 16, and beyond. A good guideline for beginners is to think about doubling when you feel your chances of winning are around 65-70%. Deciding whether to accept a double is a bit more complex; you should generally take it if you think you have at least a 25% chance of turning the game around and winning.
Money Play vs. Match Play
Your strategy with the doubling cube will change completely depending on the format. In money play, every game is its own contest. The goal is just to win as many points as you can over the course of a session. Here, you'll often see more daring doubles and takes because a single, high-value win (like a gammon) can wipe out several earlier losses.
Match play, on the other hand, is a race to a set point total, like a 7-point match. This format adds a whole new level of strategy that is tied directly to the score. For instance, if you're leading 6-2 in a 7-point match, you should never double. Why? You only need one more point to win, and doubling gives your opponent a chance to win 2 points and get back into the contest. The score dictates every move. This format is the standard for tournaments and truly shows the game's competitive depth. The international backgammon scene is quite active, with major tournaments attracting players from across the globe. For example, the Vlissingen Masters 2025 tournament brought together 64 players from 11 different countries, showing just how popular the game is worldwide. You can find more details about how these events work by checking out the international backgammon federation's events.
The Crawford Rule and Competitive Etiquette
In match play, there's a specific rule to stop a player who is just one point from victory from immediately doubling to seal the win. This is known as the Crawford Rule. The rule says that when one player gets to a score that is one point away from winning the match (for example, leading 6-0 in a 7-point match), the doubling cube cannot be used for the next game.
This gives the player who is behind one "free" game to try and stage a comeback without having to face an immediate double. After that single Crawford game is played, the doubling cube is back in play for any subsequent games in that match. Understanding details like this is essential for anyone looking to get into the world of competitive backgammon.
Digital Tools and Modern Learning
Technology has completely changed how players, both new and seasoned, get the hang of backgammon. What used to mean finding a local club or a very patient friend can now be done with a few taps on your phone. Modern digital tools offer amazing ways to practice, analyze, and sharpen your grasp of backgammon game instructions and more complex strategies. The growth here is impressive; the global backgammon software market is expected to hit about $50 million USD by 2025, thanks to smartphones and the internet being everywhere. This surge in digital platforms gives players a serious advantage.
Backgammon on Your Device
The simplest way to jump in is with mobile apps, which provide everything from guided tutorials to challenging AI opponents. These apps are ideal for practicing the basics like hitting, re-entering from the bar, and bearing off without the pressure of a live game. They create a safe environment to mess up and learn from your mistakes, which is one of the quickest ways to build up your confidence. The number of apps available is huge, with something for every skill level and taste.
Just take a look at the options you might find in an app store. This image gives you an idea of the sheer variety, from boards with a classic feel to modern versions packed with features like online multiplayer and in-depth stats.
From Practice to Analysis
Going beyond just playing games, the real strength of digital tools is in analysis. Many advanced platforms, such as Backgammon Galaxy, use sophisticated AI that can review your games after you've played them. This is like having a personal coach pointing out where you went wrong and suggesting better moves. The AI might show you where you overlooked a key hit or made a risky play that left you wide open.
- Error Analysis: These tools highlight your blunders, explaining why another move would have been a better choice. For example, it might show that moving a different checker would have improved your defensive structure.
- Positional Quizzes: Many platforms offer daily challenges where you must find the best move in a tricky scenario. This is a great way to improve your ability to read the board.
- Opponent Matching: Playing online connects you with a global community. This lets you test your skills against all sorts of playing styles, which is crucial for becoming a more adaptable player.
Using these resources can turn your gameplay from a simple pastime into a focused learning journey. Finding the right digital tool can significantly speed up your progress from a beginner to a self-assured, strategic player.
At MarbleCultures, we believe the experience of a classic game is made better by a beautiful board. After sharpening your skills online, you can bring that knowledge to the physical world with a stunning, handcrafted set that turns every game into a memorable event. Check out our collection at MarbleCultures and find the perfect board to match your new skills.